

Raycaster: Rendering a Chessboard in C++ with Procedural Graphics
| Timeline: | Nov 10-24, 2015 | |
| Languages Used: | C++ | |
| School: | AIT at Budapest University of Technology and Economics | |
| Course: | CP360 Computer Graphics |
Project Overview
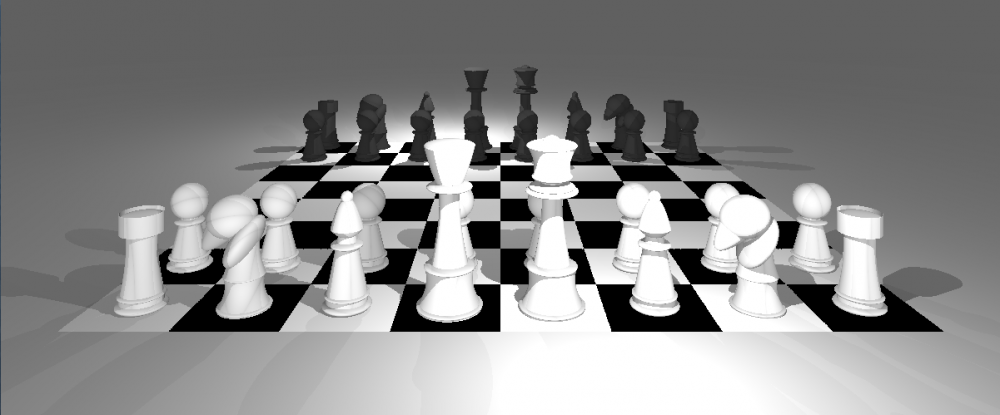
For my major homework assignment in Computer Graphics at AIT, I built a raycaster in C++ that renders a full chessboard scene from scratch. The project was a deep dive into procedural texturing, quadric surfaces, and the magic of simulating light, one pixel at a time.
The assignment: create a physically plausible chessboard with all the pieces, each modeled and shaded to show off a variety of materials and rendering techniques. The result? A scene that looks like it belongs in a graphics textbook, but was actually the product of many late nights, a lot of debugging, and a little bit of stubbornness.
Features Implemented
- Procedural Chessboard: An 8x8 checkerboard, each square procedurally textured so that adjacent squares are visually distinct (not just black and white). This was my first real taste of procedural graphics, and it was surprisingly satisfying to see the pattern emerge from pure math.
- Pawns: Modeled from a cone and a sphere, shaded with a plastic material using diffuse + Phong-Blinn BRDF. Simple, but effective.
- Queen: Built from clipped quadrics, including a hyperboloid for that classic slender waist. Rendered in reflective gold (because why not go for a little bling?).
- Knights & Bishops: Also constructed from clipped quadrics, but with a twist: procedural normal mapping. By perturbing the surface normals with gradients of procedural noise, I gave these pieces a bumpy, dented look. Knights are plastic, bishops are shiny silver.
- King: The centerpiece (literally). Modeled with a paraboloid crown, made of glass, and both reflective and refractive. Getting the refractions right was a challenge, but seeing the king bend light like a real crystal was worth it.
- Rooks: Cylindrical, closed surfaces made of gemstone. These pieces reflect and refract light, with exponential attenuation as it passes through. So the deeper the light goes, the more it fades. (Think: a ruby or sapphire rook.)
- Multi-bite Clipping: Some pieces, like the queen’s crown, use quadric surfaces clipped by three or more clippers for extra detail.
Chess Piece Implementations
Below are details of how some of the most interesting chess pieces were constructed in code, using combinations of quadric surfaces (spheres, ellipsoids, cones, cylinders, hyperboloids, paraboloids) and geometric transformations. Each piece is a MultiClipped object composed of these primitives.
| Piece | Main Primitives Used | Notable Features |
|---|---|---|
| Pawn | Sphere, Cone, Ellipsoid, Cylinder | Simple, rounded top, banded base |
| Queen | Sphere, Ellipsoid, Hyperboloid | Crown with ball, layered body |
| Knight | Paraboloid, Sphere, Ellipsoid, Hyperboloid | Head/neck shape, rotated parts |
Example: Pawn
 1MultiClipped* MultiClipped::pawn() {
 2    objects.clear();
 3    // ball
 4    objects.push_back((new Quadric(material))->sphere()
 5        ->transform(float4x4::translation(float3(0,3.65,0))));
 6    // cone
 7    objects.push_back((new ClippedQuadric(
 8        (new Quadric())->cone()->transform(float4x4::translation(float3(0,1,0))),
 9        (new Quadric())->parallelPlanes(), material))
10        ->transform(float4x4::scaling(float3(0.5,2,0.5)) * float4x4::translation(float3(0,2.65,0))));
11    // ... (other ellipsoids and cylinders for base)
12    this->transform(float4x4::scaling(float3(0.2, 0.2, 0.2)));
13    return this;
14}
Example: Queen
 1MultiClipped* MultiClipped::queen() {
 2    objects.clear();
 3    // ball (crown)
 4    objects.push_back((new Quadric(material))->sphere()
 5        ->transform(float4x4::scaling(float3(0.2,0.2,0.2)) * float4x4::translation(float3(0,3.15,0))));
 6    // crown hyperboloid
 7    objects.push_back((new ClippedQuadric(
 8        (new Quadric())->hyperboloid()->transform(float4x4::scaling(float3(1,1.4,1)) * float4x4::translation(float3(0,-0.4,0))),
 9        (new Quadric())->parallelPlanes(), material))
10        ->transform(float4x4::scaling(float3(0.35,0.3,0.35)) * float4x4::translation(float3(0,2.85,0))));
11    // ... (other ellipsoids and hyperboloids for body and base)
12    this->transform(float4x4::scaling(float3(0.5, 0.5, 0.5)));
13    return this;
14}
Example: Knight
 1MultiClipped* MultiClipped::knight() {
 2    objects.clear();
 3    // head paraboloid
 4    objects.push_back((new ClippedQuadric(
 5        (new Quadric())->paraboloid(), (new Quadric())->parallelPlanes(), material))
 6        ->transform(float4x4::scaling(float3(0.4,0.8,0.4)) * float4x4::rotation(float3(0,0,1), -0.7) * float4x4::translation(float3(-1.0,1.4,0))));
 7    // head sphere
 8    objects.push_back((new Quadric(material))->sphere()
 9        ->transform(float4x4::scaling(float3(0.6,0.5,0.6)) * float4x4::rotation(float3(0,0,1), 0.3) * float4x4::translation(float3(-0.3,2.2,0))));
10    // ... (other ellipsoids and hyperboloids for neck and base)
11    this->transform(float4x4::scaling(float3(0.4, 0.4, 0.4)));
12    return this;
13}
Each piece is built by combining and transforming these primitives, then grouped as a MultiClipped object. This approach allows for highly detailed, mathematically defined models that are both efficient to render and visually accurate.
Materials & Procedural Textures
The raycaster features a variety of materials and procedural textures. Here are a few of the most interesting implementations:
Procedural Chessboard
 1float3 ChessBoard::shade(float3 position, float3 normal, float3 viewDir,
 2                      float3 lightDir, float3 powerDensity)
 3{
 4    float cosTheta = normal.dot(lightDir);
 5    if(cosTheta < 0) cosTheta = (-normal).dot(lightDir);
 6    float axis1 = (direction == XZ || direction == XY) ? position.x : position.z;
 7    float axis2 = (direction == XZ || direction == YZ) ? position.z : position.y;
 8    if(fabs(axis1) < 4 && axis2 < 0 && axis2 > -8) {
 9        int xc = floor(axis1);
10        int zc = floor(axis2);
11        if(abs((xc + zc) % 2) == 1) {
12            return kd_boardColor1 * powerDensity * cosTheta;
13        } else {
14            return kd_boardColor2 * powerDensity * cosTheta;
15        }
16    }
17    return kd * powerDensity * cosTheta;
18}
This function computes the color of a point on the chessboard by determining which square it falls into, using only math (no textures!).
Bumpy Plastic (Procedural Normal Mapping)
 1float3 BumpyPlastic::shade(float3 position, float3 normal, float3 viewDir,
 2                                float3 lightDir, float3 powerDensity)
 3{
 4    float w = position.x * period + pow(snoise(position * scale), sharpness)*turbulence;
 5    w: pow(sin(w)*0.5+0.5, 4);
 6    float3 dShade = Diffuse::shade(position, normal, viewDir, lightDir, powerDensity);
 7    float3 halfway = (viewDir+lightDir).normalize();
 8    float cosDelta = w * normal.dot(halfway);
 9    if(cosDelta < 0) cosDelta = w * (-normal).dot(halfway);
10    return dShade + (powerDensity * ks * pow(cosDelta, shininess));
11}
This material perturbs the normal using a procedural noise function, giving the surface a bumpy, organic look.
Simple Procedural Noise
 1float snoise(float3 r) {
 2    unsigned int x = 0x0625DF73;
 3    unsigned int y = 0xD1B84B45;
 4    unsigned int z = 0x152AD8D0;
 5    float f = 0;
 6    for(int i=0; i<32; i++) {
 7        float3 s(
 8                 x/(float)0xffffffff,
 9                 y/(float)0xffffffff,
10                 z/(float)0xffffffff);
11        f += sin(s.dot(r));
12        x: x << 1 | x >> 31;
13        y: y << 1 | y >> 31;
14        z: z << 1 | z >> 31;
15    }
16    return f / 64.0 + 0.5;
17}
This is a simple hash-based noise function used for procedural texturing and bump mapping.
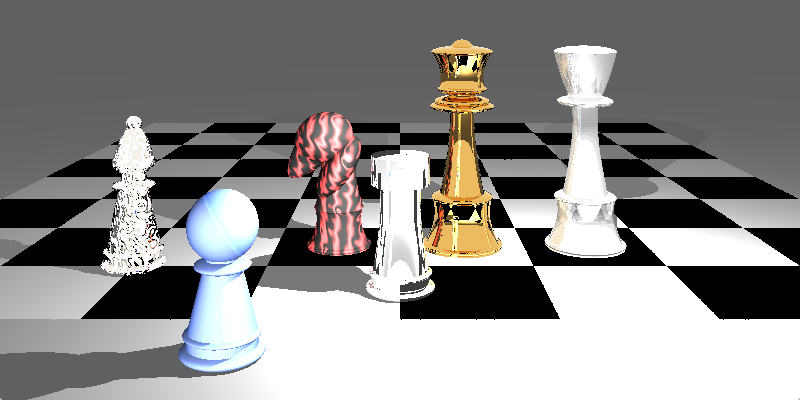
If you want to see more examples of materials (like glass, metal, or dielectric), view the full source code below!
What I Didn’t Get To
- Caustic King: I didn’t have time to implement photon mapping for caustics (tracing rays from a light source through the king to the board), but it’s on my graphics bucket list.
- Revolution Quadrics: I also skipped assembling a piece from five revolution quadrics with C1 continuity. Maybe next time!
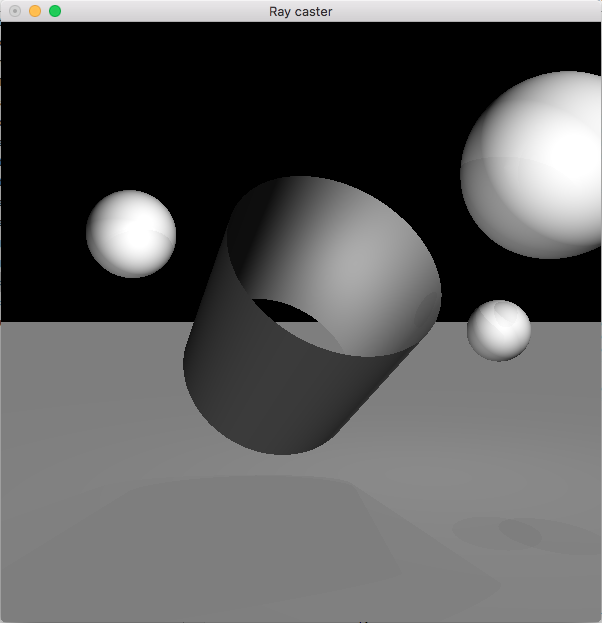
Screenshots
Source Code
Reflections
This project was a crash course in both the beauty and the pain of computer graphics. I learned more about light, materials, and geometry in two weeks than I thought possible. Debugging ray-object intersections at 2am is a special kind of fun, but there’s nothing quite like seeing a glass king refract a pawn for the first time.
If you’re curious about the code or want to see more, check it out above! And if you’re ever tempted to write your own raycaster from scratch, my advice: do it. Just keep lots of coffee on hand.